Create tickets
Part 1: Create your ticket product in Shopify
Section titled “Part 1: Create your ticket product in Shopify”Before configuring your event type and timeslots in Foyer, you’ll need to create your ticketed product in Shopify. Once created, the product will become available in the Foyer app, where you can select it, configure the event type, and set your available timeslots.
- In Shopify select Products from the side menu then click Add product.
See Shopify’s guide on Adding and updating products.
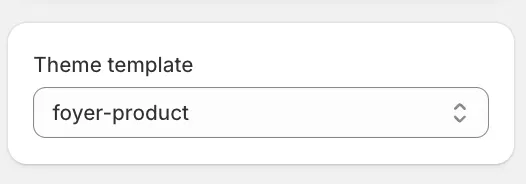
- Set your Theme template to foyer-product
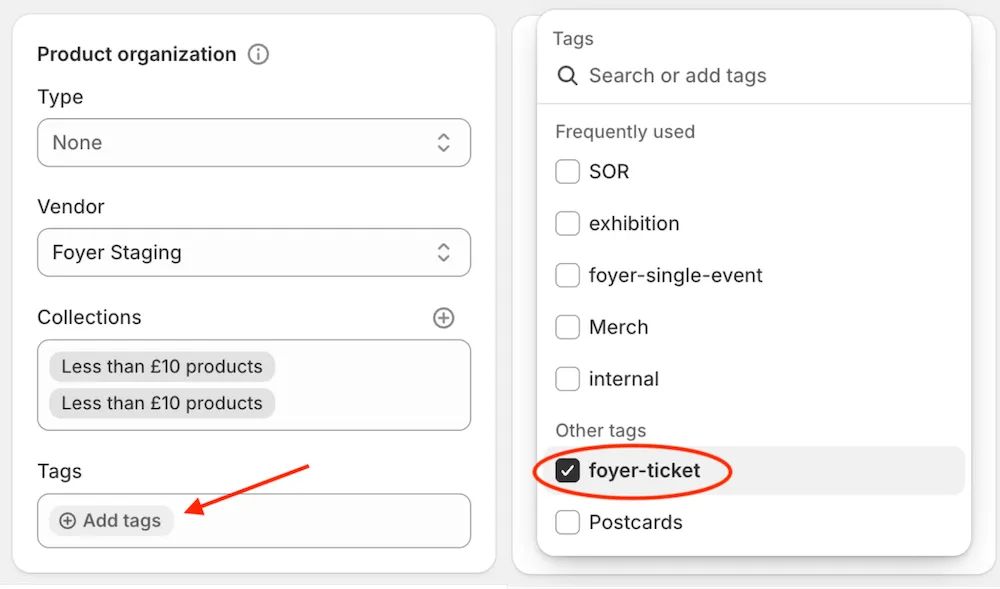
- Tag your new product with foyer-ticket
- The Foyer Order tag must then be added to the order for it to be recognised as a Foyer ticket order and appear on the Timeslot page in the app.
- The Foyer Order tag can be added to orders manually, or automatically using Shopify Flow.
Note: When creating your first Foyer product, the foyer-ticket and foyer-single-event tags need to be created by typing them in. Once created on the first product, they will be saved and available as frequently used fields for all subsequent Foyer products. They will automatically associate the product with the Foyer app.
Must tag the orders Foyer Order for them to appear in the timeslot page using Shopify Flow: New order > tag is equal to foyer-ticket > Add foyer order tag
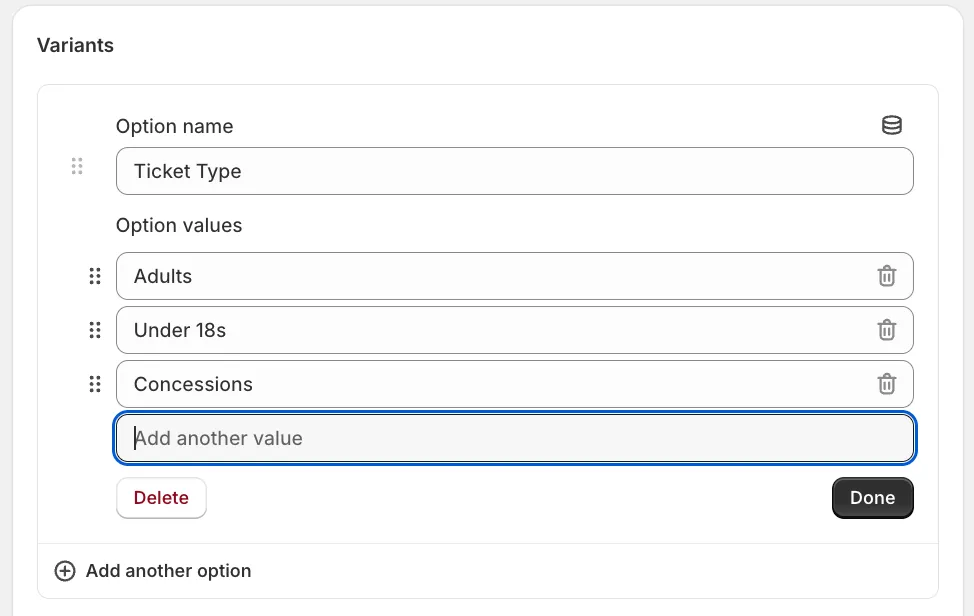
- Add your ticket types as product variants of your new product. For example, you might create variants for Adults, Under 18s, and Concession tickets.
See Shopify’s guide on Variants.